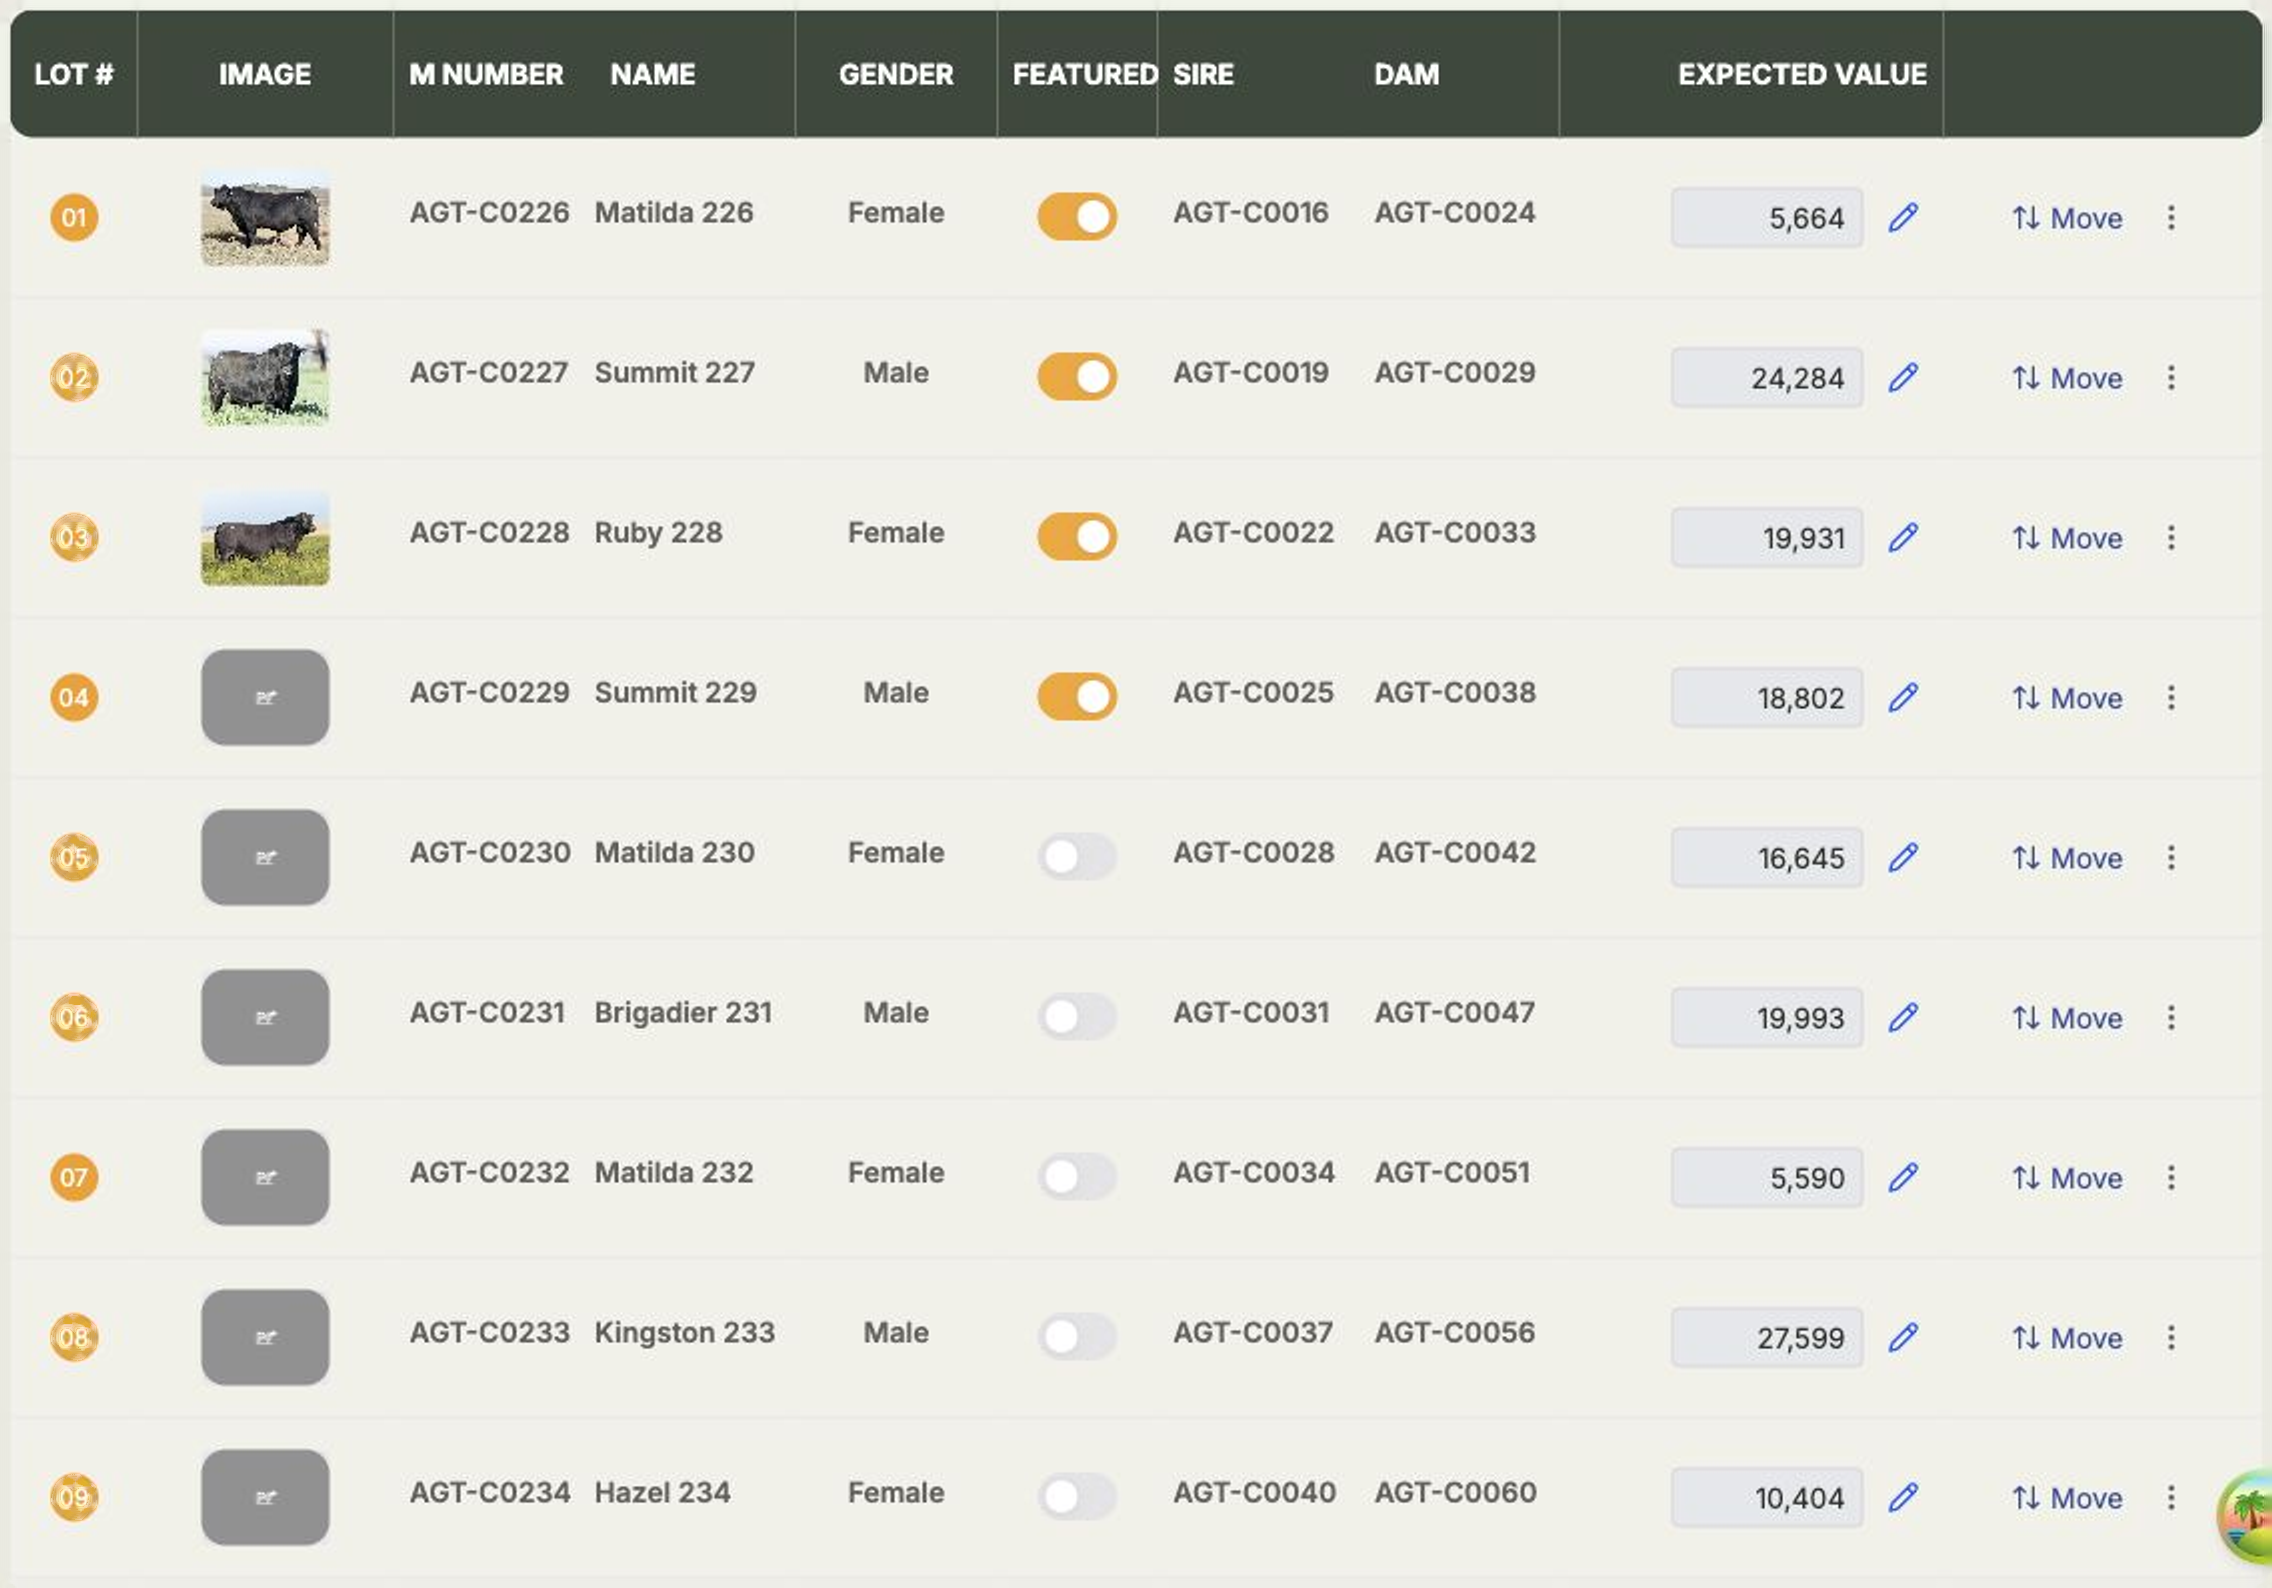
Appearance
Running and finishing a sale
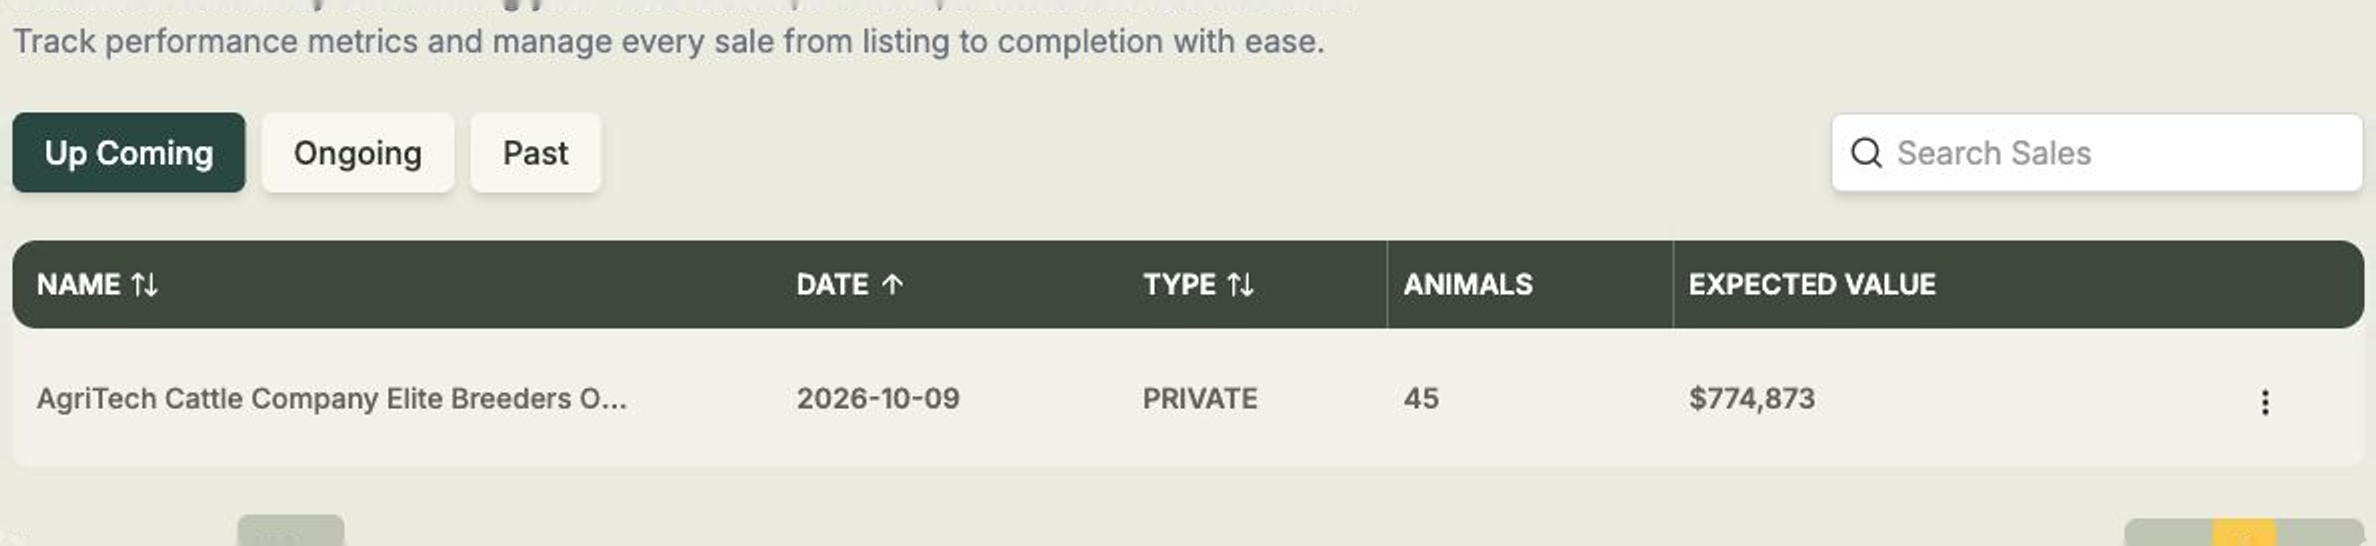
Once your lots are ready and published, the next step is to run the sale event. This is the point where Frisbee switches from preparing the catalogue to recording sale results.
Start the event before recording sold animals
You need to select Start Event before you can mark sale animals as sold from the sale results table. While the event is still Up Coming, the Animals tab is for adding, ordering and publishing lots. After the event is Ongoing, the same tab changes to the sale results view, where you can record buyers and sold prices.
Start the sale event
- Open Sales, then open the sale event.
- Check that the animals, lot order, expected values and public sale page are ready.
- Select the Event actions menu in the sale header.
- Choose Start Event.
- Confirm the prompt.
The event moves from Up Coming to Ongoing. The header shows Event In Progress, and the Animals tab now shows Unsold and Sold result views instead of the lot setup table.

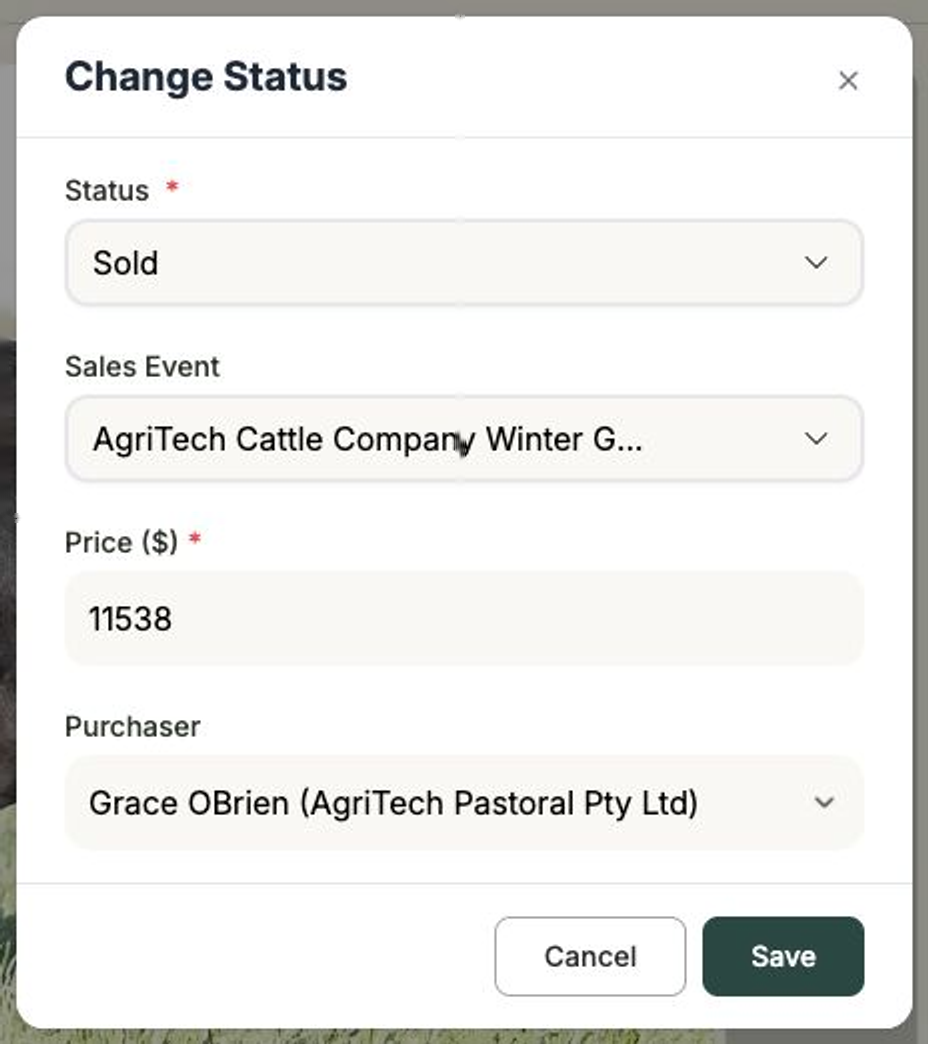
Record individual sold animals
Use this when you only have a few results to enter, or when you want to update lots as they sell.
- Open the sale event and stay on the Animals tab.
- Leave the filter on Unsold.
- Find the animal and select the Add Sales Info action.
- Keep Sold selected, enter the Purchased Value, and choose the Purchaser from your clients.
- Save the change.
The animal moves to the Sold view. The purchaser is linked to the client record, so that client's purchase history and investment summary update from the sale result.
Bulk upload sold animals
For a larger sale, use Upload Sold Animals to record many results at once.
- Start the event first, so the event is Ongoing.
- Open the event's Animals tab.
- Select Upload Sold Animals.
- Download the template.
- Fill in one row per sold animal.
- Upload the completed
.xlsxfile.
The template uses these details:
- animal_id — the animal's ID, animal number or M number.
- client_name or client_first_name — the buyer's client name. Client last name is optional when your template includes it.
- sold_price — the final sale price.
The animals must already be added to this sale event. Client names need to match existing clients, so import or create missing clients before uploading the results.
You can upload after closing too
Bulk sold-animal upload is available for Ongoing and Past sale events. This is useful if you want to start and finish the event on sale day, then upload final results afterwards.
Finish the event
When the sale is complete and the results are recorded:
- Open the Event actions menu in the sale header.
- Choose End Event.
- Confirm the prompt.
The event moves to Past and shows Event Completed. Sold animals stay linked to their buyers and sold prices. Unsold animals are reset back to active animal records so they are no longer treated as sale animals.