Appearance
Creating an email campaign
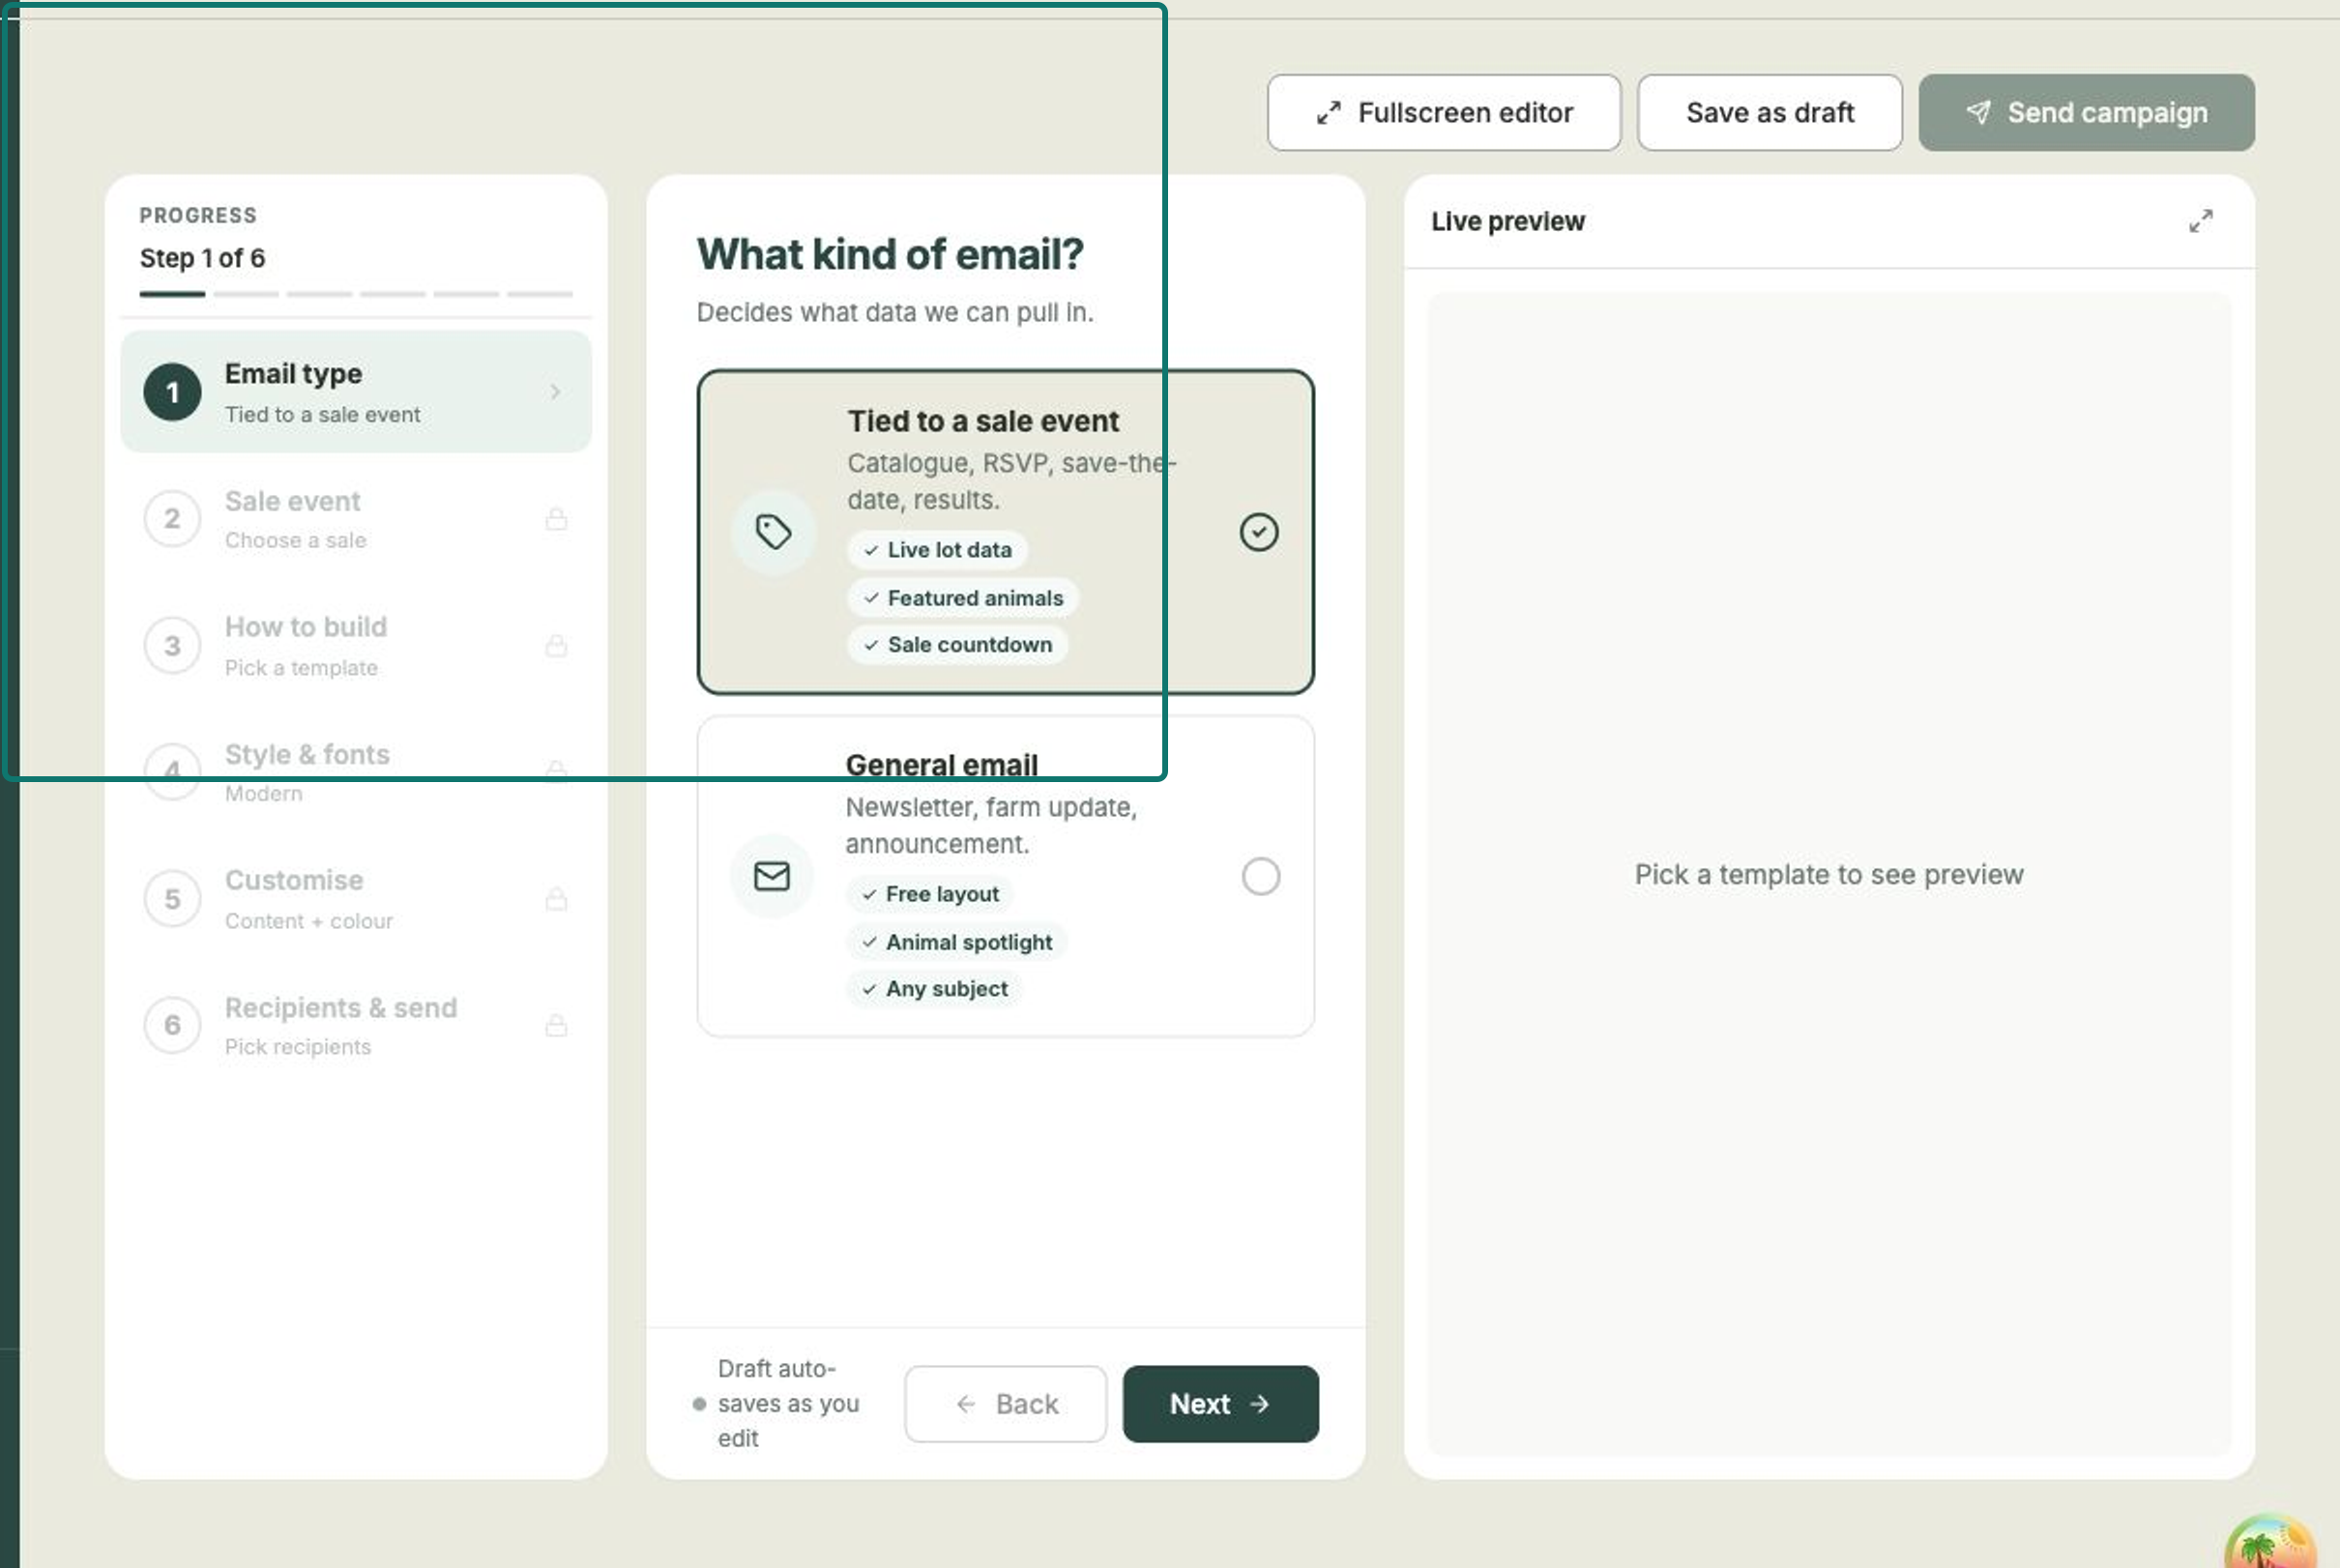
Open Marketing from the left-hand menu, then select + Create Campaign to open the wizard. The wizard walks you through six short steps, and a Live preview on the right updates as you go. You can leave at any point — your campaign auto-saves as a draft.
Steps
Choose the email type. Decide whether your email is Tied to a sale event (a catalogue, RSVP, save-the-date or results email that pulls in live lot details and a countdown) or a General email (a newsletter, farm update or announcement with a free layout).
Start by choosing whether the email is tied to a sale or a general update. Pick the sale event. If your email is tied to a sale, choose which one. Your sales are grouped into Ongoing, Upcoming and Past, and each card shows the date, name, location, lot count and status. (You'll skip this step for a general email.)
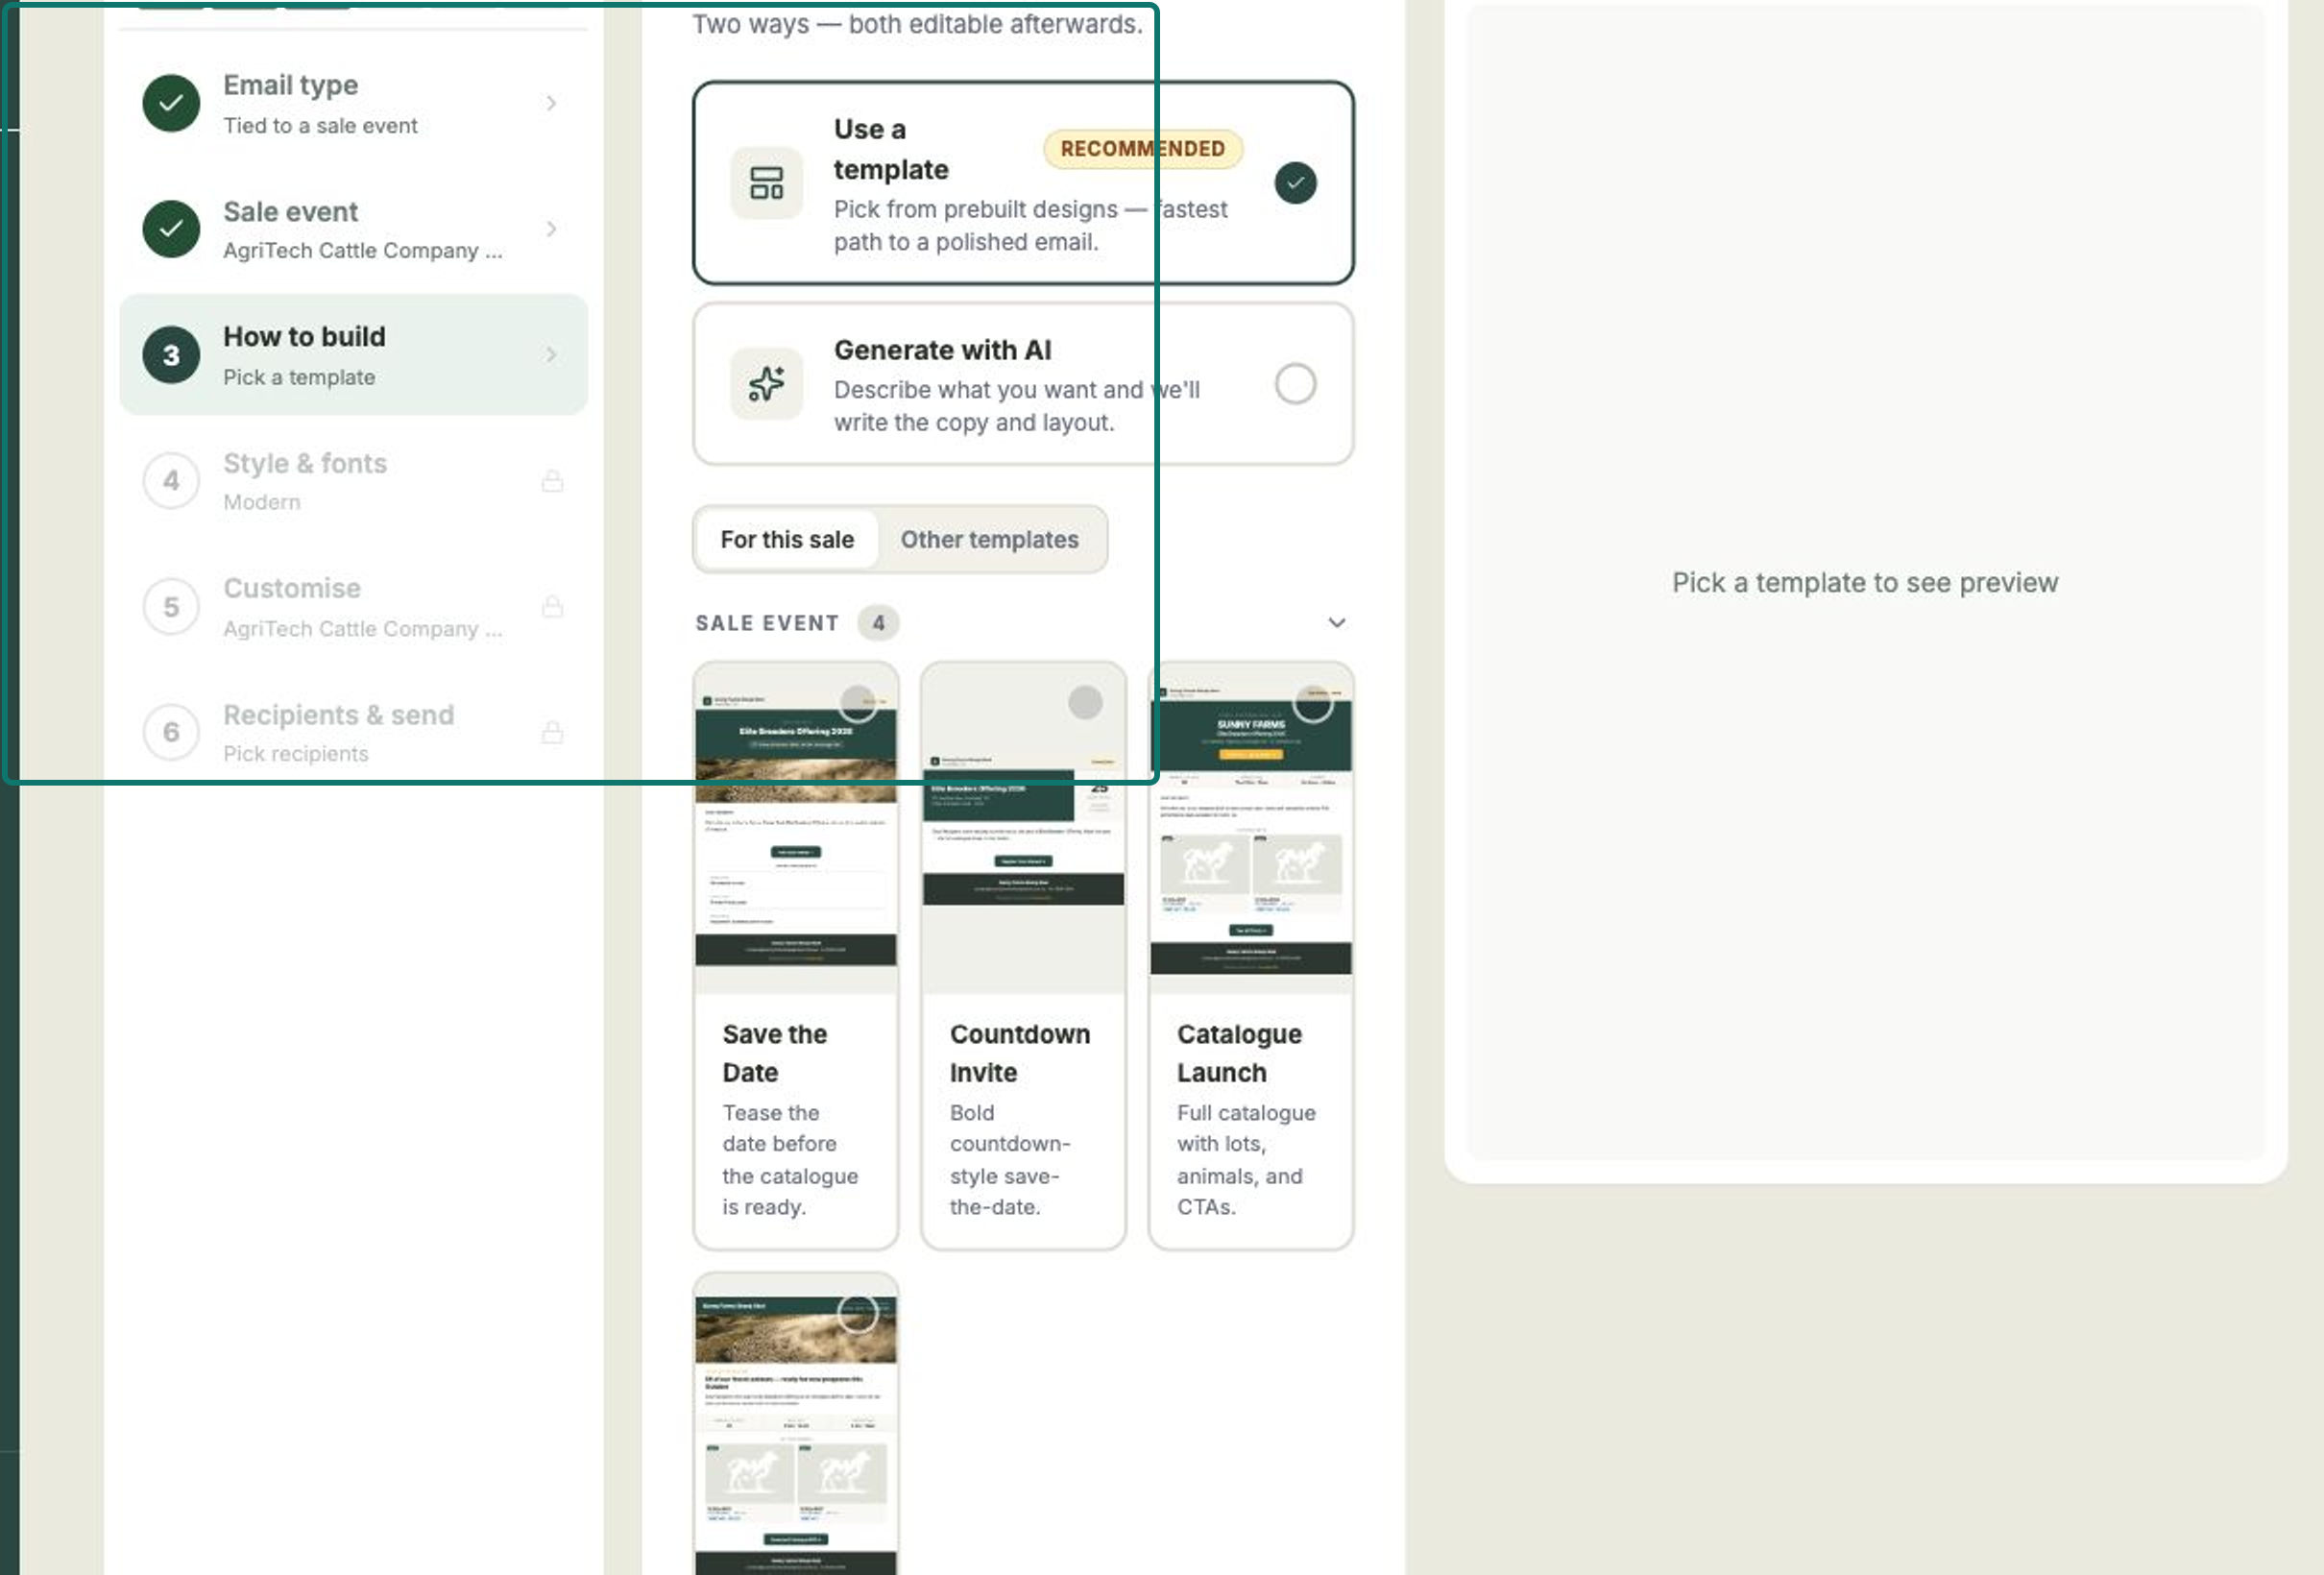
Choose how to build it. Either Use a template for a ready-made design, or Generate with AI — just describe what you want and Frisbee writes the copy and layout for you. Sale templates include Save the Date, Countdown Invite, Catalogue Launch and Editorial Catalogue.
Pick a ready-made template, or let Frisbee draft the email with AI. Choose a style. Pick the look that suits your brand — Modern (clean and uppercase, the classic Frisbee look), Classic (a heritage serif), Editorial (magazine-style headlines) or Bold (big, auction-poster lettering). The content stays the same; only the fonts and headings change.
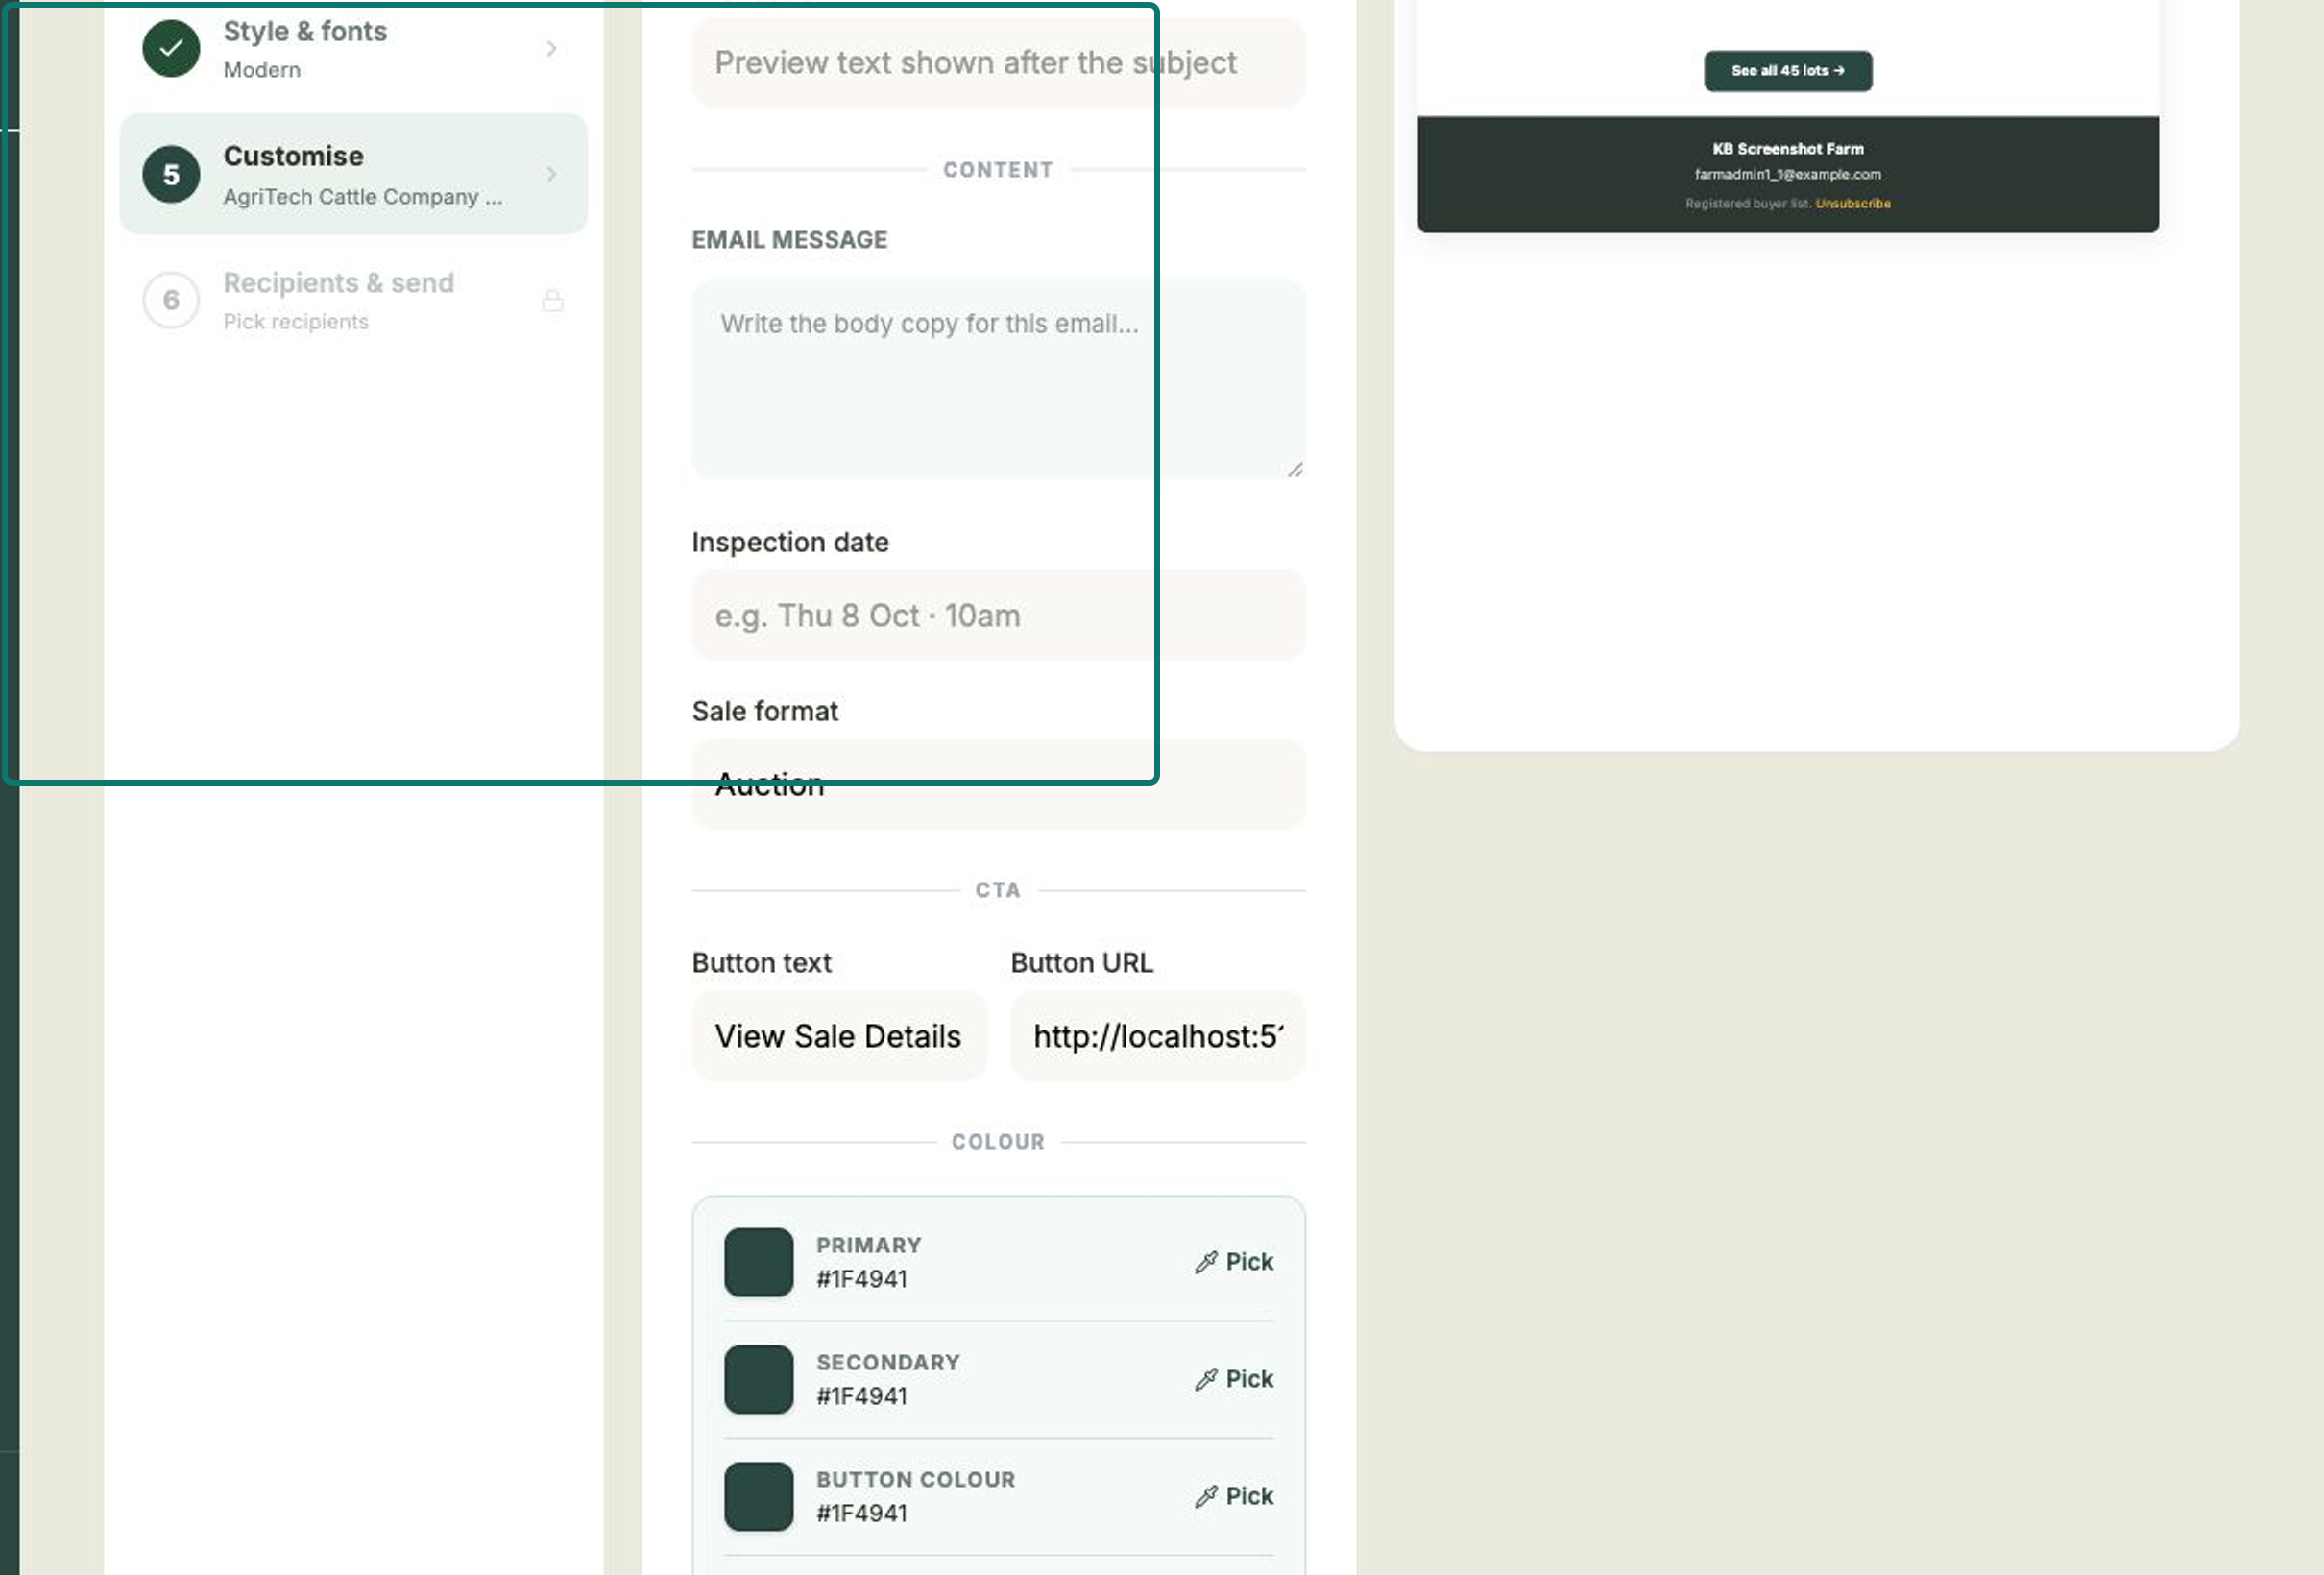
Make it yours. Add your Campaign name and Subject line (both required), an optional Preheader, and your Content. Set up your call-to-action with Button text and a Button URL, and adjust the colours — Primary, Secondary, Button, CTA text and Primary text — to match your farm. Watch the live preview update as you type.
Add your content, set the button and colours, and watch the live preview update. Choose recipients and when to send. Under Send to, pick All Active Clients or Pick client groups to send only to chosen client tags. Under When, choose Send now or Schedule to pick a date and time. When you're happy, select Send campaign.
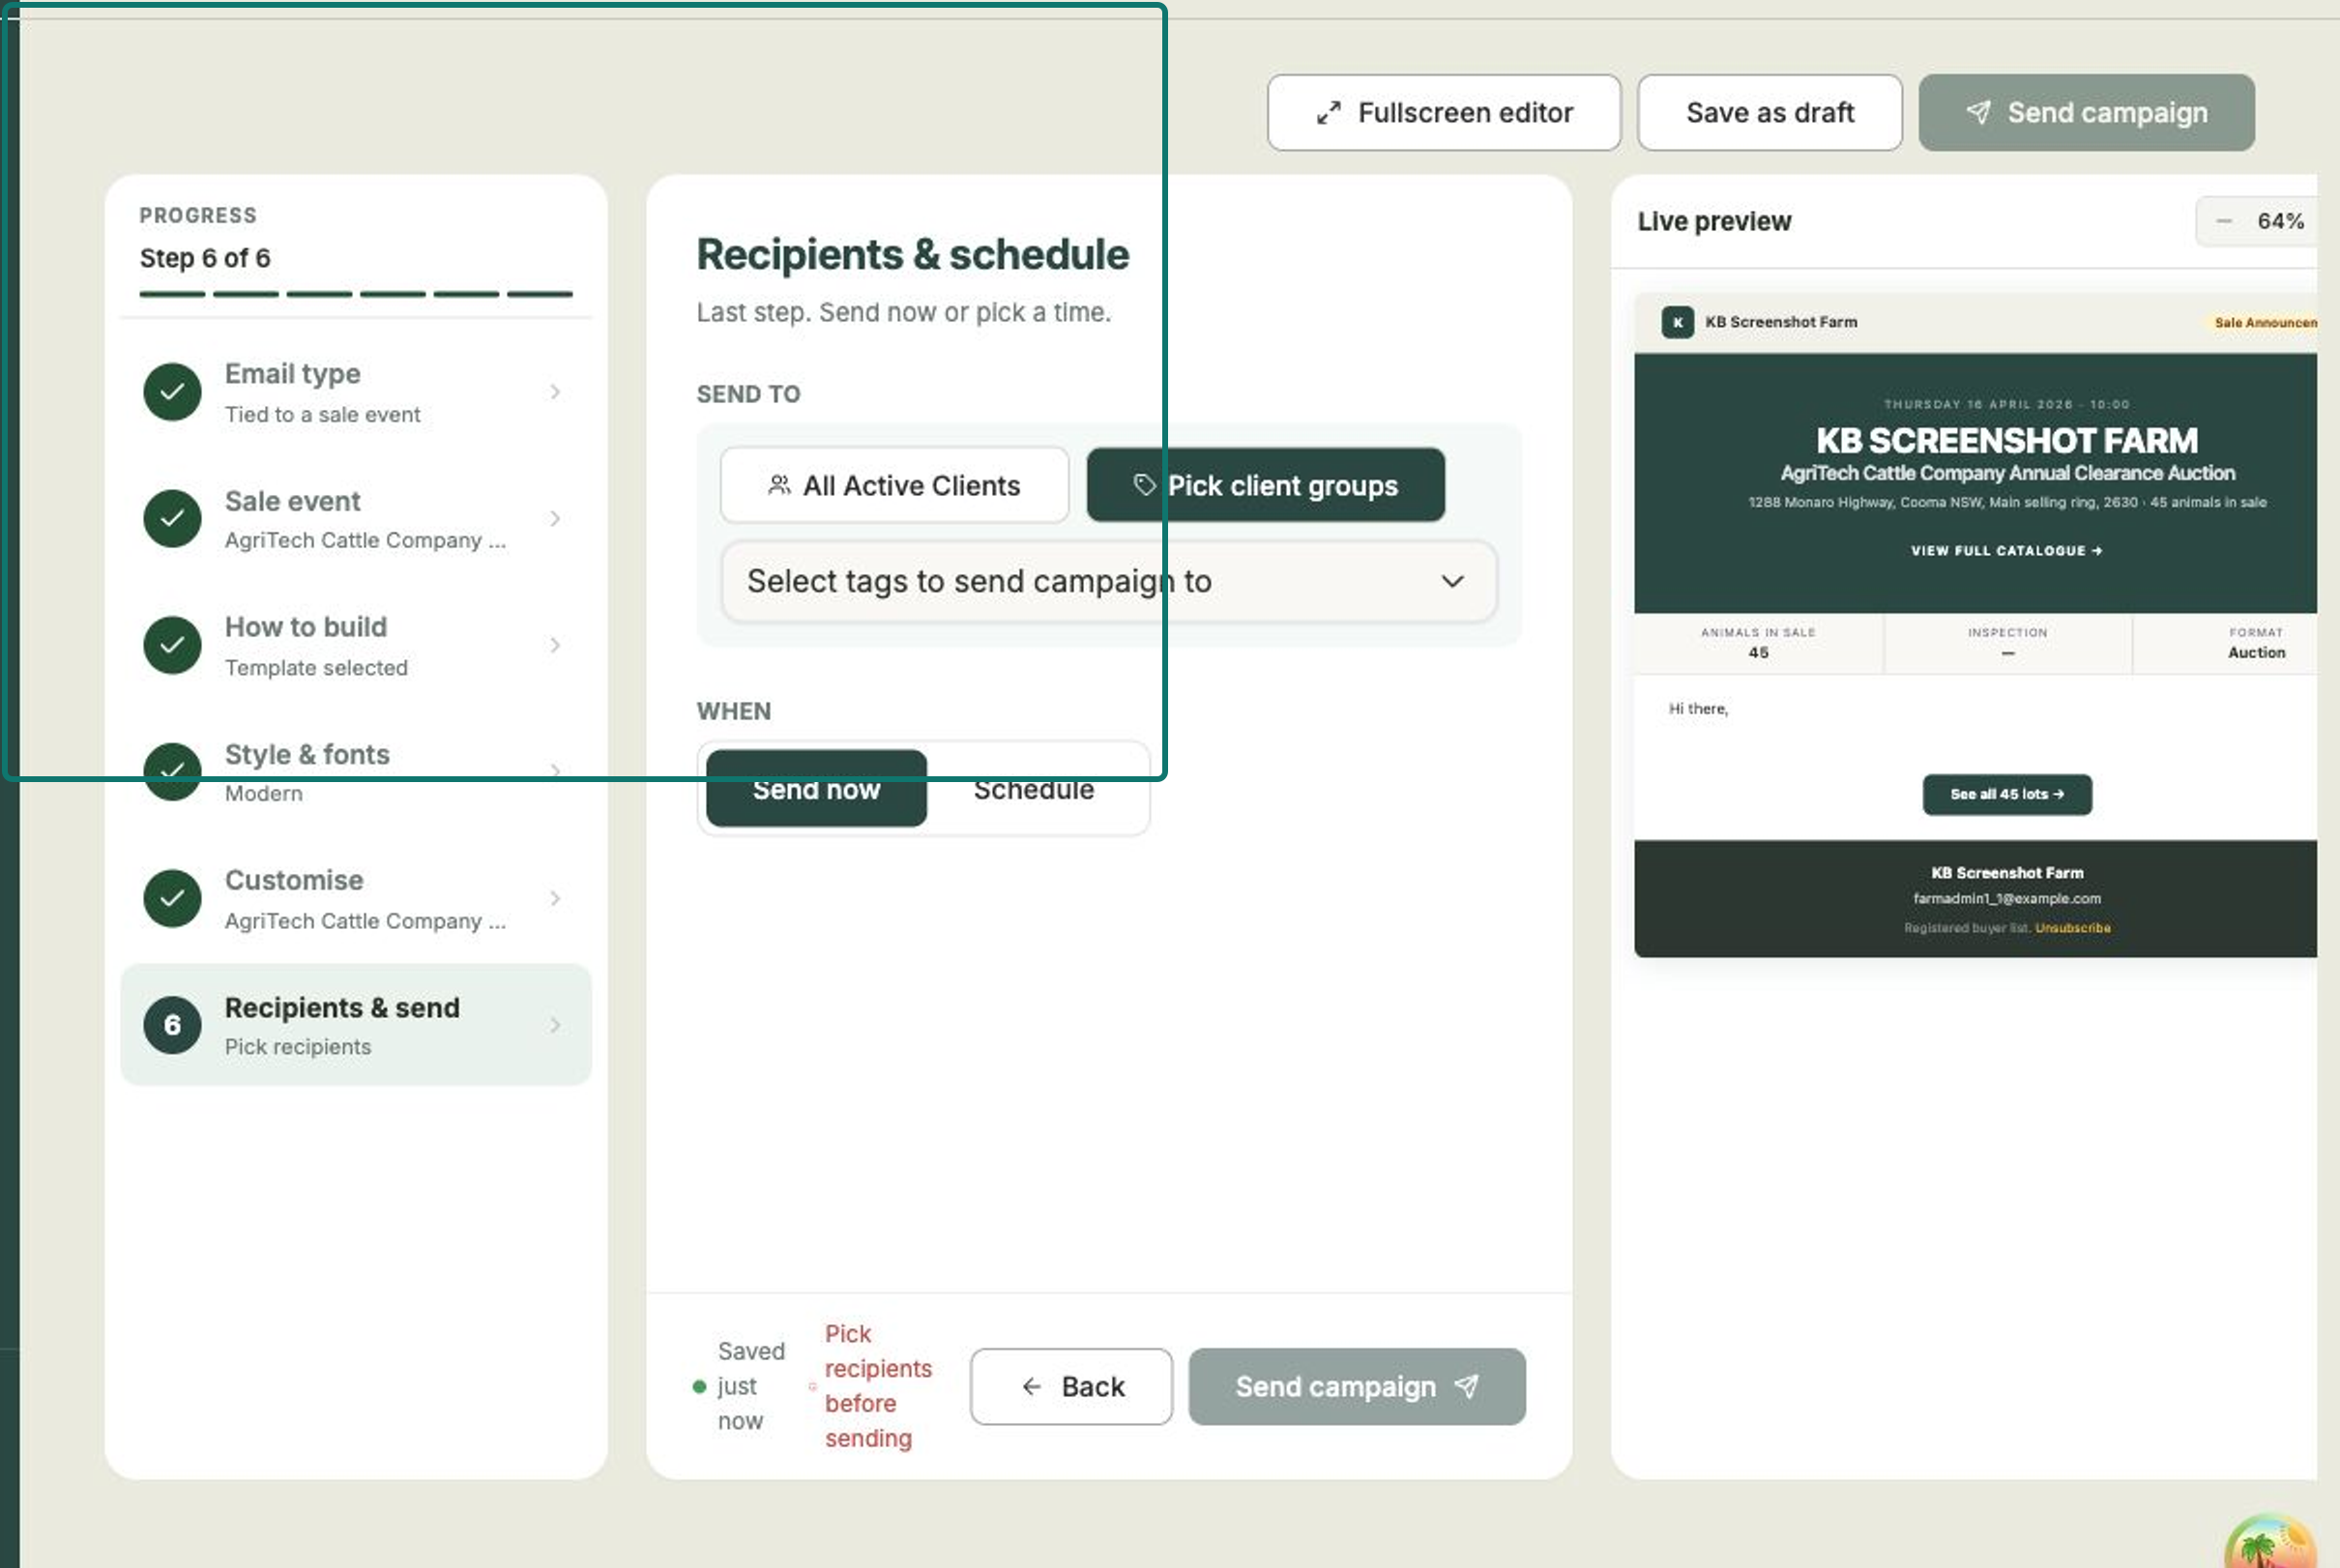
Choose who receives the email and when, then select Send campaign.
Save as draft any time
Use Save as draft to keep working later — your draft appears under the Draft tab on the Marketing page, where you can reopen it to keep editing.
What happens after you send
- A scheduled campaign waits under the Scheduled tab until its send time.
- Once it goes out, the campaign moves to Sent, and its Unique Opens and Unique Clicks start to fill in. Open the campaign to see how it performed.
- Older campaigns eventually show as Expired.